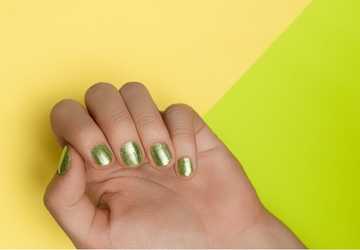
Experiments and DIY with different classy yet achievable nail art designs from the comfort of your home.
Looking like a diva every day is a desire we all share. That's why nail art is currently so popular-it breathes new life into your hands.
By learning this art, you can save both time and money on frequent salon visits. Whether you're a beginner or an amateur, this article will equip you with simple techniques and unleash your creativity, allowing you to paint your nails like a pro. Enhance your style and become your manicure expert with us.
Some Tips to Remember Before We Start!

Mess-free nail art: Apply petroleum jelly/lotion around the cuticle area or commercially available nail polish barrier for mess-free application.
Prep your nail: Prep your nail before cleaning, and trim down any rough area on the nail and around the cuticle for a smooth, finer polish coating.
Nail tools: You can easily buy a set of multiple brushes, stencils, stamps, stickers, and other tools anywhere for quick and easy application of nail art design.
1. Floral pattern
● Put, any nail base color will pop out other shades of flower design more.
● Then, for better detail, use a thin nail brush or basic dotting tools to draw floral petals on the background color easily.
● Use your artistic skills for placement and drawing flowers of different sizes to make them more intricate.
● Add leaves or other elements to make it more realistic.
● Finally, when you are satisfied with your art, use a top coat for shine and longevity.
2. Simple Polka Dot Design
● First, you have to apply any solid color base of your liking. If you are applying a lighter background color, then the dot should be of darker shades, and vice versa.
● Then, take your dotting tool of different sizes. You can create polka dot designs easily.
● With these tools, the mandala pattern can also be made with a few nails on it, while the remaining coat has a plain base color and a colorful geometric design.
● Now seal it with a top glossy coat, and your funky nail art is done.
3. Glitter Bomb
● Choose any darker color paint, like maroon or black, for the background color.Then, grab tape or paste it on top of the background color in any geometrical shape.
● After that, paint the area of the nail that is not covered with tape completely with glitter nail polish.
● After a few minutes, when the nail paint is dry, carefully remove the tape.
● Apply the top coat, and you will have a sparkly, glittery pattern within minutes.
4. Water Bowl Method
If you love the marbling design but need help to do it using tools, then we've got you covered.
● Just fill any bowl with water, then drop different colors of nail paint in its center one by one.
● When you are satisfied with your pattern, take a toothpick and mix this drop to create a marbling effect.
● Then, dip your finger vertically in it, and you will get a beautiful marble effect.
● Repeat the same process each time for every nail from the start, and you will get a unique marble design on every nail.
● Remove any excess marble pattern around the cuticle, and you are good to go.
5. Ever Green French Tips
● Opt for any nude nail paint for the base, apply two even coats of it, and let it dry.
● Now, use fine brush guides for the nails to create thin white lines across each nail evenly.
● Fill up any gaps or mistakes, and use a top coat to secure your final artwork.

6. Nail Stickers
● You don't need to do anything fancy on this art. Apply the base coat that you like evenly.
● Then, choose any nail sticker you like and paste it where you want.
● For a pop-out effect, outline the sticker surrounding.
● Once you are happy, seal it with a top coat.
7. Doodling
● You can apply one or more background colors on the nail first.
● Then grab some different sizes of nail brushes and freestyle any pattern you want in any color that your heart desires.
● After completing your mini canvas on each nail, set it with a top coat.
● In this technique, each time, you will create something new & it's a fun way to challenge your artistic mind.
8. Metallic Chrome Art
● Use any base coat along with neutral gel polish, then cure it, and to remove stickiness and residue, use rubbing alcohol.
● Again, apply a no-wipe coat and cure it, then gently rub your desired chrome powder in a circular motion with an applicator brush.
● Once the shiny surface is achieved, set it with a no-wipe top coat layer and cure it.
● Then remove any residue with a clean brush, and you have beautiful gradient metallic nails.
9. Splash Art
● Take any light base color and apply at least two coats for full coverage.
● Then, dip any flat brush in nail polish and create a splashing design on the nails by thumb.
● Repeat this same process with multiple nail shades to create a colorful pattern.
● Once your splattering art is dry, apply a top coat.
10. Festive Celebration
To celebrate each moment of your favorite holiday or festival, you can customize your nails.
● Choose a base color that signifies that moment.
● Now, pour all your creativity into making cute pictures like a heart for Valentine's Day, a Christmas tree, a snowman, etc.
● You can also use stencils or stickers for quick fixes and play with different color themes, shimmers, and designs to make your holiday nail art.
● To make it more bling and shiny, use sparkling rhinestones and studs for more drama
● And remember to evenly coat it with a glossy top to make it more lustrous.
Conclusion
Go and grab all your nail art supplies and let your inner child take control to make nail art more fun and exciting.
These are just a bunch of ways mentioned above to learn, but you can experiment in many dimensions using glitter, colors, stones, and sparkles and find which is your favorite.
Engage yourself in this magical world of nail art so you can paint them like a pro that will fit in with every occasion and style.


